Keeping your water filtration system running efficiently is key to having clean and safe drinking water. One of the most important components of an effective home water treatment system is a UV light filter. The ultraviolet process helps to kill bacteria and other pathogens in the water, but the UV lamp needs to be replaced regularly for optimal performance. Replacing your UV light can seem daunting at first, but with proper preparation and care, this job can be done quickly and easily.
In this guide, we’ll walk you through each step required to replace the UV lamp from your UV water purifier so you can keep your filter running smoothly for years to come.
Quick Bulb Replacement Steps
- Turn Off Water Supply & Close All Faucets Jump To Step
- Disconnect Unit From The Electrical Outlet Jump To Step
- Remove The Lamp Connector Jump To Step
- Disconnect Lamp From The Lamp Connector Jump To Step
- Remove The UV Lamp From The Housing Jump To Step
- Install The Replacement UV Lamp Jump To Step
- Connect The New UV Bulb Jump To Step
- Update System Controller Jump To Step
- Turn On Water Supply And Test The System Jump To Step
How A UV Light System Works
UV Water purifiers work by emitting ultra violet rays through the water supply as it passes through the UV chamber. This process will kill up to 99.9% of harmful microorganisms. It is critical that your UV water purification system is paired with a filtration system. In order for an ultraviolet light to work optimally, the water passing through needs to be clear of sediments. If there is lingering debris in the water, it will deflect the UV rays and prevent it from completely treating water.
Some manufacturers require a sediment filter in front of the UV system in order to ensure you do not void the system’s warranty.

How To Properly Dispose Of Your Used UV Bulb
Many states are now requiring used UV light bulbs to be recycled in the appropriate facilities. According to the Environmental Protection Agency (EPA), these states require UV bulbs to be recycled: Minnesota, New Hampshire, California, Massachusetts, Maine, Washington, and Vermont. Since mercury is a dangerous dangerous substance, recycling UV light bulbs is the most eco-friendly option.
If there is not a suitable disposal location to recycle your UV bulb near you, the best alternative is to seal the bulb in a plastic bag and dispose of it in your regular garbage. If throwing the used UV lamp away in your trash is illegal where you live, the last option is to use a hazardous material waste facility in your area.
What You Will Need
This list of materials will depend on what is included with your UV replacement lamp. For this guide, we are using the Kind Water Systems UV lamp, but these steps will work for nearly all UV water purification systems. Double-check the owner’s manual to make sure you have everything required before beginning.
- Phillips Head Screwdriver
- Cotton Gloves
- Replacement UV Lamp
- O-Rings
Replacement Instructions: Step By Step
Turn Off Water Supply & Close All Faucets
The first step in replacing your UV lamp of the UV water purifier is to shut off the main water supply. This will ensure that no water comes into contact with any of the electrical components when you begin working. Once the water has been fully shut off, open all faucets in the house to relieve pressure from the system, and then turn off the faucets.

Disconnect Unit From The Electrical Outlet
Be sure to unplug the UV water treatment system from your power supply. Doing so prevents any sudden spikes in voltage that could damage electrical components while you are working on the water filtration systems.

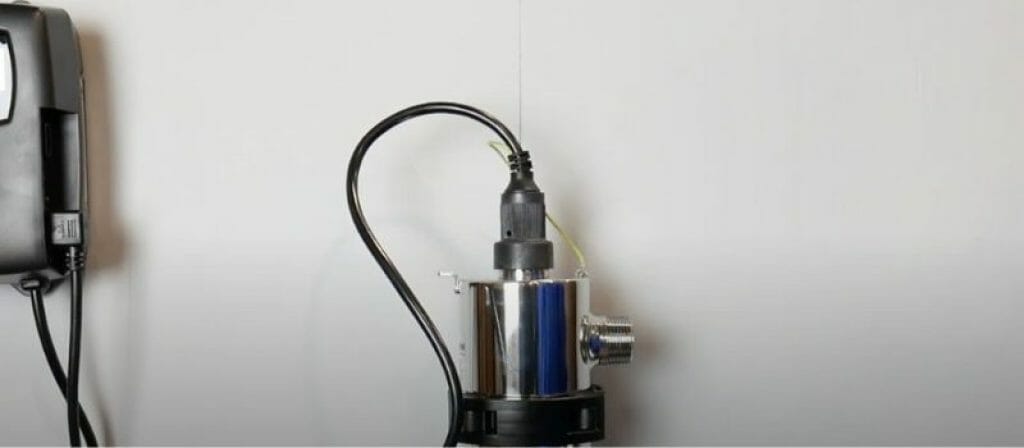
Remove The Lamp Connector
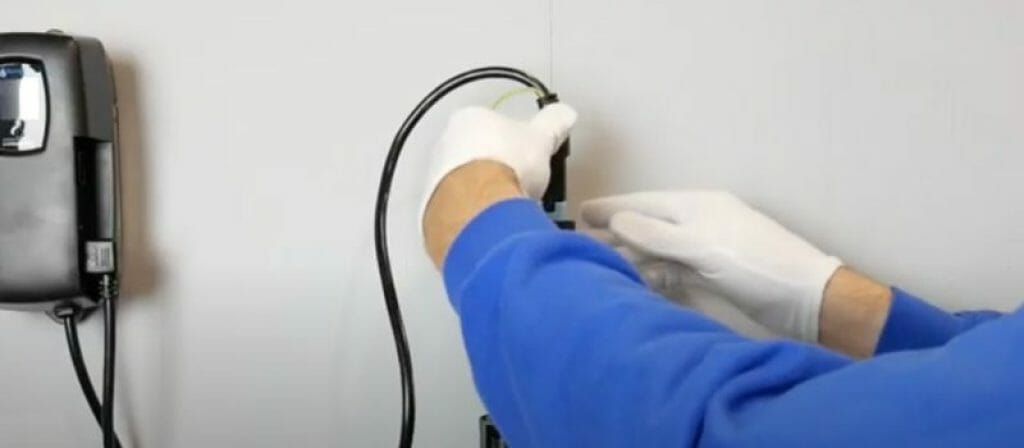
The UV bulb can get very hot after extended usage and needs to be allowed to cool down before you begin working on it. After a few minutes, unscrew the grounding screw using a Philips head screwdriver. Carefully remove the lamp connector from the reactor housing by pushing the cap down and rotating it a quarter turn.

Disconnect Lamp From The Lamp Connector
Now that you have disconnected the power and UV lamp sleeve assembly from its housing, you can disconnect the UV lamp from the lamp connector. This is done by carefully pulling the UV quartz sleeve from its connector base in an upward motion
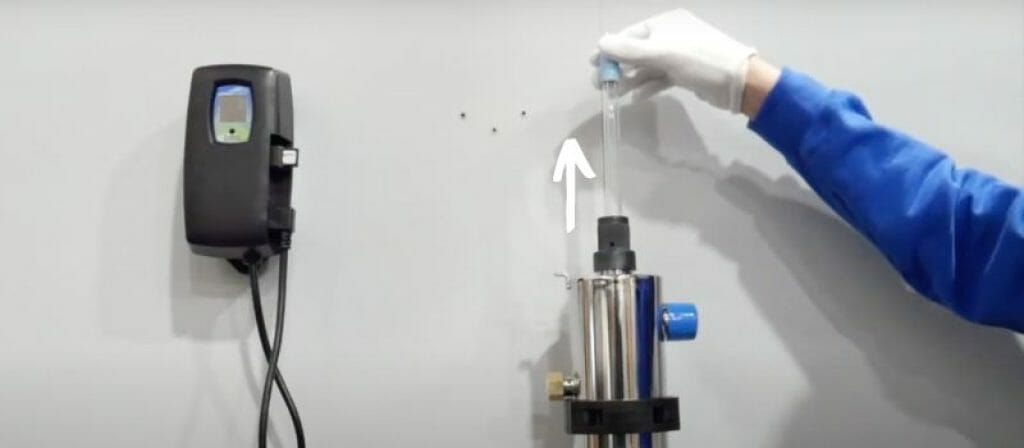
Remove The UV Lamp From The Housing
Once the assembly has been fully disconnected, you can now remove the UV lamp from the housing sleeve. Ensure you take it straight out to ensure you do not break the lamp. Be careful when touching the lamp as it may be hot from usage. Also, be sure to wear a pair of white cotton gloves to protect your hands and the system.
Install The Replacement UV Lamp
Now carefully unpack your new UV lamp making sure you do not contact it with your skin. If your system also has a replacement lamp key, set that aside for now. Carefully place the new UV bulb back into the quartz sleeve. Insert the bulb in a straight motion so you do not break it against the housing.
Pro Tip: This is a good time to check your quartz sleeve housing. If your quartz sleeve is still in good condition, you can simply clean it with a soft cloth and warm water to remove any buildup that may be present. If not, you will may to replace it so your system functions effectively.

Connect The New UV Bulb
Connect the new bulb with the lamp connector. After connecting with the bulb, push the lamp connector down into the gland nut and rotate a quarter turn to lock it into place. Now re-attach the ground screw from the cap back onto the reactor housing

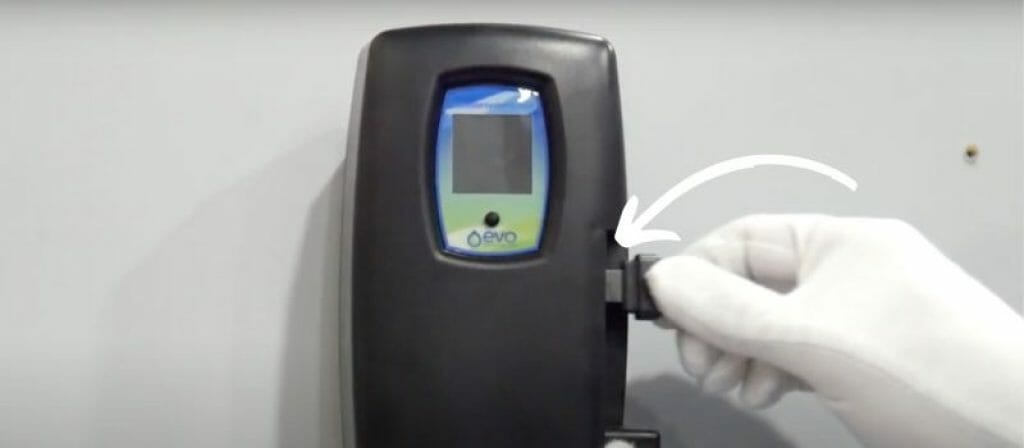
Update System Controller
Now that the UV bulb is secured and installed, you can replace the UV key in the system’s controller. Remove the old UV key and insert the new one. Now the controller is safe to plug back into the electrical outlet. The display should reset the replacement time to track the next replacement cycle.
Turn On Water Supply And Test The System
Turn on the water supply and check the system for any leaks and ensure it is functioning correctly. If there not no issues, your system is ready to go!
Once all of these steps are completed, your UV system should be up and running again at optimum performance levels. With regular maintenance, your UV system can keep providing safe clean water for years to come!
UV Lamp Replacement Guide Video
How Often Should You Change Your UV Filter?
The general rule of thumb for replacing your UV bulb is every 6-12 months, depending on the size and type of filter you have. It’s also important to keep an eye on the performance of your filter over time, as this could indicate that it’s time to replace it sooner than anticipated.
If you notice any signs of decreased performance, such as a change in water taste or odor, it’s best to replace the filter right away. Doing so will ensure that your filter is working at its optimal level and provide you with clean, safe drinking water.
It’s also important to note that different types of UV filters may require more frequent maintenance and replacement. For example, if you are using an ultra-violet germicidal lamp to kill bacteria, then you will need to replace the UV light bulbs (unlike regular light bulbs) and quartz sleeves at least once a year for optimal performance.
Finally, be sure to follow all instructions provided by the manufacturer when replacing your UV lamp. Doing so will ensure that the installation is done correctly and safely, preventing potential health hazards down the road.
How Do I Know If My UV Light is Still Good?
If your ultraviolet light bulb is still functioning properly, you will typically notice a slight glow or buzzing from the UV light bulb when it’s turned on. You may also be able to see a faint blue-green color emanating from the fluorescent tube. If either of these signs is absent, then it’s likely time to replace your UV lamp and sleeve.
Should I Turn My UV System Off When Not in Use?
Yes, it’s a good idea to turn your UV system off when not in use. This will help conserve energy and reduce the amount of wear and tear on the filter over time. Additionally, doing so will also extend the lifespan of your bulbs and quartz sleeves to avoid premature lamp failure.
Are UV Lamps Safe?
Ultraviolet (UV) lamps are generally considered to be safe when used correctly. They emit a low level of UV radiation that is not enough to cause any significant harm, even with prolonged exposure. Additionally, UV lamps generally contain between 10 – 150 mg of mercury per lamp. The mercury vapor does not make it’s way into the water supply, but it underscores the importance to regularly replace the uv lamp to prevent premature lamp failure.
However, it’s important to always follow the manufacturer’s instructions and take necessary precautions when handling and installing your UV filter, as well as wearing protective gear such as gloves and eye protection. Doing so will ensure that you are safely using your UV system to provide clean, safe drinking water for years to come!
It’s also important to note that although UV rays coming from UV lamps cannot cause cancer, they can damage the skin if exposed for long periods of time. So be sure to keep UV lamps out of reach of children and pets, or in an enclosed area with a secure lid.
Soft Glass Lamps vs Hard Glass UV Lamps
When replacing your UV lamp, it’s important to use the correct type of bulb. Generally, hard glass UV lamps are more durable and offer better UV protection than soft glass bulbs. Additionally, they also last longer (up to twice as long!) so you won’t have to worry about having to replace your filter as often.
Hard glass UV lamps also tend to be more energy efficient than soft glass options, so you save money in the long run. Keep in mind that hard glass bulbs do require more precise installation and may need special tools for replacement.
UV Water Filter Benefits
Replacing your UV system bulb periodically can help ensure that it’s working properly and not letting any contaminants pass through. Some of the benefits of a UV filter include:
- Eliminate bacteria and viruses in water, so you can be sure that your drinking water is safe.
- Generally considered more safe to to eliminate microorganisms in water than using harmful chemicals like chlorine disinfection.
- Protect the integrity of pipes and other plumbing fixtures, since water with contaminants can cause corrosion over time.
- Remove chlorine from your tap water, resulting in better-tasting and smelling drinking water.
- Provide an additional layer of protection for your home’s water supply, since UV filters can catch contaminants that other systems may miss.
- Help to reduce maintenance and repair costs over time, since regular filter replacement can help prevent expensive repairs from contaminated water damage.
- Can be paired with a well water filter to eliminate common well water iron bacteria and viruses.
UV Water Filter Disadvantages
While UV systems offer many advantages, there are a few potential drawbacks to consider:
- They can be more expensive than other water purification systems, as they require special bulbs that need to be replaced regularly.
- They don’t filter out all contaminants and particles, such as heavy metals or large sediment particles like a reverse osmosis filter.
- If not properly maintained, UV filters can become less effective over time as the bulb ages.
- They require power to operate, which means if you lose electricity your filter won’t be able to protect your water supply.
It’s important to weigh the pros and cons of a UV system when deciding whether or not it’s right for your needs. With proper maintenance and regular bulb replacement, UV filters can provide a reliable way to keep your water safe and free of contaminants.
Conclusion
Now that you have finished replacing the UV light in your UV water filter system, it’s time to check that everything is working correctly. Make sure all connections are tight and secure and the new bulb is properly seated. Also, check the pressure gauge on the filter to make sure that it is reading at recommended levels. Finally, turn on the pump to ensure that it is running smoothly.
If you followed all of the steps above, your UV light water filter should now be up and running! Make sure to replace the bulb regularly according to the manufacturer’s instructions in order to get the best results. With the right care and maintenance, your water filter will provide clean and safe drinking water for years to come.