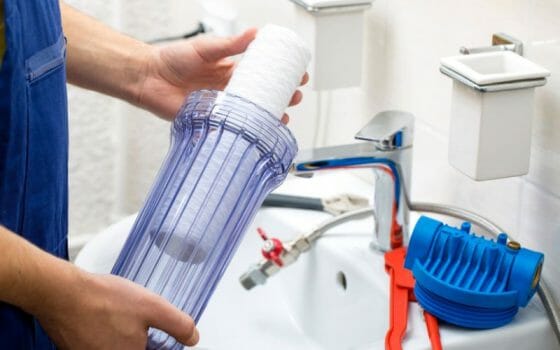
Replacing your whole house water filter couldn’t be easier. After all, with just a twist of the housing, you can take the old filter cartridge out and put a new one in its place. With just this, you are good to go, but what about when you have a whole house water filter stuck in place?
One of the most common issues homeowners have with their whole home water filters happens when replacing the cartridge. Many complain that they give the casing a twist and it just won’t give, and though this is a common problem, it can be solved with 7 easy steps.
Here we will show you how you can handle those difficult-to-remove filters and avoid them becoming stuck next time. This way, you can avoid stressing over a stuck filter cartridge for the house the next time it comes to switching out your filter.
Common Reasons For A Stuck Filter
First of all, it is important to understand why a filter canister becomes stuck. Understanding the cause of the issue will save us time down the steps ahead. Here are a few common reasons:
- The plastic has shrunk due to cold temperatures.
- The filter housing threads were cross-threaded
- The filter housing retains a large amount of pressure
- The o-ring sealing the casing to the filter housing has become damaged
- Mineral buildup has formed inside the casing.
- Excessive debris buildup inside housing
- The filter casing is over-tightened
- A screw fastening the filter canister is rusted or seized
How To Remove A Stuck Filter Canister
If you’re wondering what to do when your whole house water filter housing is stuck, there are a few hacks. The good news is you can perform these tasks with common household tools. Even though the cartridge may not twist off at first, with just a few tips and tricks, you can get your filter loose:
- Depressurize the system: Do not attempt to open the filtration system while it is pressurized. First of all, the canister will be extremely hard to remove, and secondly, it will create quite a mess. Begin by turning on the system bypass. If a red water pressure release button is located on the filter casing, press it until the pressure is released. If a bypass valve is not installed, open every faucet in the home until the pressure is released.
- Add lubricant: Sometimes old filter housings, screws, and bolts just need a little lubricant added. Apply industrial-grade lubricant directly to the affected housing threads or screws. You can even try this with WD-40. After letting the lubricant sit for 15 minutes, you can attempt the dislodge the stuck component.
- Begin twisting back and forth by hand: By slightly rotating the canister clockwise and counter-clockwise, it may break loose deposits holding the cartridge in place. Try repeating this several times, and the canister may break free. Otherwise, continue with the next step.
- Use two wrenches: Chances are that you have already tried removing your casing with only a single wrench, and this did not work. Your filtration system may have come with the filter cartridge wrench. If not now is a good time to get the appropriate filter wrenches. However, one way you can gain some extra grip is by sliding two wrenches over the housing and using them both at the same time. If you need some extra leverage, try sliding a length of pipe over the wrenches and using that to apply even more force.
- Use a rubber strap wrench: Rubber strap wrenches are designed to remove cylinder-shaped objects. You may have also seen these wrenches to remove a vehicle oil filter. Using a rubber strap wrench will give you a tighter grip and allow for more torque.
- Heat the casing with a blow dryer: If your filter is still stuck, a great option is to heat up the casing with a blow dryer. Aim the blow dryer at the exterior and let it heat up the outside. Wait until it is noticeably hot around the entire exterior, and this will cause it to expand just slightly, allowing you to open it with the system wrench. If it is a stuck screw, direct the heat directly at the screw. Be careful not to melt any of the plastic as you do this!
- Lightly tap the housing: Many times filter housesings are stuck from mineral or debris buildup. If you have a small wooden or rubber mallet, you can lightly tap the threads to dislodge the housing. Do not use a metal hammer or it risks cracking the filter.
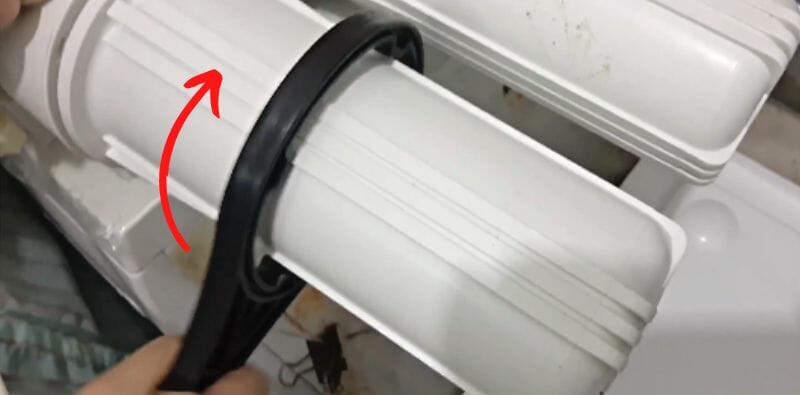
How To Remove A Stuck Filter Cartridge From Housing
Just as filter canisters can become stuck on the housing, filter cartridges can become stuck inside the casing itself. Most often, this occurs due to a buildup of minerals inside the casing holding it in place. This can be challenging due to the lack of space inside the casing. Nonetheless, we have a few tips to remove your filter stuck filter cartridge:
- Twist the cartridge both ways. Just like you rotated the casing both ways to try and break it free, do the same with the filter cartridge. Use your fingers to grasp around the filter and try to rotate it both clockwise and counter-clockwise and pull it out.
- Try using needle nose pliers. Needle nose pliers can fit inside the canister and allow you to get a better grip on the cartridge than you could get with your fingers alone. Try rotating the filter and pulling it out.
- Try applying heat. If the cartridge still doesn’t come out, then try applying some heat with a blow dryer. Aim the blow dryer inside and apply heat to melt some of the deposits and loosen the filter. Next, try gently tapping the housing and use needle nose pliers to grasp the filter and draw it out.
How To Prevent a Stuck Whole House Water Filter
In the future, replacing your whole house water filter won’t be such a challenge as long as you do it regularly. Here are a few tips to keep in mind to keep your filter from becoming stuck in the first place.

Avoid Over-tightening
The single most common reason that filters become stuck is by over-tightening them. Try to avoid this and tighten only as much as is needed to prevent leakage.
Replace Old and Worn O-Rings
Whenever you change a filter cartridge, inspect your o-rings to ensure they are placed correctly, and replace them whenever they are broken or show signs of wear. This can prevent the O-ring from bunching up and jamming the housing in place.
Apply Plumbers Clear Silicone Grease
Applying silicone grease to the o-ring can help to create a better seal preventing leaks. This has another benefit as well beyond helping to keep things dry, and that is preventing the need to tighten your filter as much.
Install Your Unit in A Warm Place
If your filtration system is installed in a place that gets excessively cold in the winter, such as a garage, this is likely to cause more difficulty swapping out filters down the line. This is because the cold will cause the plastic your unit is made out of to shrink ever so slightly, making it harder to unscrew your canister when it comes time to replace the filter. The solution to this is to make sure the unit is located in a place with access to heating when the weather gets cold out.
Ensure The Filter Is Correctly Sized
A filter that is not the correct size for your home can create water pressure drops and unnecessary stress on the filter housing manifold. If a filtration system is too small, it can lead to pressure building up in the filter housing and the head becoming stuck. Double-check that your system’s specifications are compatible with your home’s plumbing specs.