If your water supply is riddled with contamination, a whole house water filter system can remove bad taste, odors, heavy metals, and chemicals from every drop of water entering your home.
One of the first questions that comes up is how to install a whole house water filter. Hiring a professional for the job will cost a few hundred dollars. And it can be intimidating to contemplate installing one on your own, but it is possible! In this guide, we will walk you through step-by-step how to install a whole house water filter system to save you the added expense.
Quick Installation Steps
- Attach Tank Head Jump To Step
- Connect Bypass Valve Jump To Step
- Install The MNPT Fitting Jump To Step
- Activate And Flush The Carbon Media Jump To Step
- Pre-Plumbing Connection Setup Jump To Step
- Connect Tank To Plumbing Jump To Step
- Test The System Jump To Step
Preliminary Steps
In this demonstration, we are showing how to install a tank-based whole house water filter, which is the most popular type of system. A tank-based system consists of a tall tank that holds the carbon filter media, as opposed to a cartridge-based system that utilizes cartridge filters.
The specific unit we installed is the SpringWell CF Whole House Filter. Although there are subtle differences between various filter brands, in general, this guide will sufficiently walk through the installation of any tank-based water filter. If you have a well water filter with an electronic control head, the only extra step will be programming the electronic control head.
Where To Install A Whole House Water Filter
There are several locations that are suitable for installing a whole house water filter. Here are the things to know when selecting the best location in your home.
Point Of Entry
When installing a whole house water filter, you need to place it close to your main water entry line. It is best to install the system at the earliest point in your home’s plumbing. This means your water filtration system comes before your water heater and other appliances, but before a water softener if you have one. This will protect your water filter and prevent damage to your water heater. When selecting the final location, ensure it is on a sturdy flat surface. In some cases, you will also need access to an electrical plugin.
Outdoor Installation
Whole house water filtration systems can be installed outside if suitable for your home’s plumbing setup. Note that not all tank water filters are compatible with outside installation. Make sure to check the specifications of the system before deciding between an inside or outside location.
The temperature must not drop below freezing or it will damage the filter system. Ideally, the temperature should range between 35 – 90 degrees Fahrenheit, and be out of direct sunlight.

Some manufacturers require a professional installation so you don’t void the warranty. Read the owner’s manual to ensure your specific filtration system is installed correctly.
What You Will Need
This list of materials will depend on what is included in your water filtration unit. Some come with a full installation kit and some do not. Double-check the owner’s manual to make sure you have everything required before beginning.
- Screwdriver
- Plumbers Tape
- Adjustable Wrench
- Pipe Cutter
- Tape Measure
- Pluming Pipe Fittings & Adapters
- Flexible Supply Connectors
Installation Instructions: Step By Step
Attach Tank Head
Up to 24 to 48 hours prior to installing your system, the carbon media in the tanks need to be activated. This can be accomplished by filling the tank with water. Since most systems are shipped without the tank head attached, you will first need to attach that.
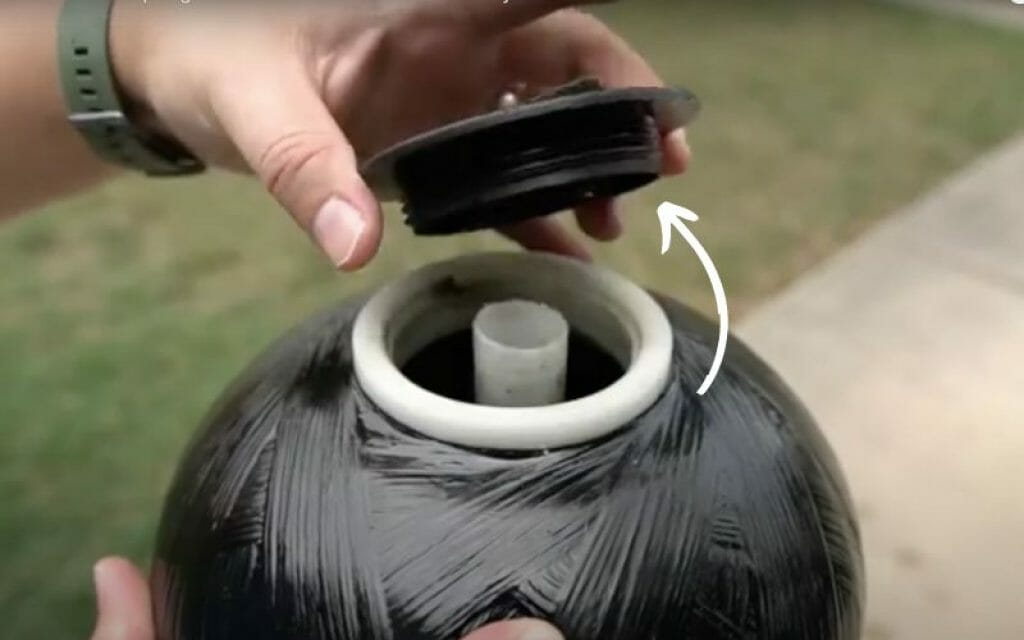
Begin by unscrewing the small protective cap located on the top of the tank. There is an opening on the bottom of the tank head that will align with the pipe that’s found inside of the tank. Align them and press the tank head in place. Press down on the tank head while simultaneously threading it.
Begin by hand tightening the head. Once the head is hand tightened, you will need to fully seat it in place. To give you leverage, you can insert the head of a screwdriver into one of the openings. With the right amount of leverage you can now fully tighten the tank head on to the top of the tank. Please note that once a tank head has been screwed onto the tank, under no circumstance should you unscrew it, or you risk damaging your system. This may also cause the carbon media to seep into your plumbing.


Connect Bypass Valve
The bypass valve is now ready to be installed. Note that not all systems come with bypass valves. If your system does not have one, you can skip to the next step. There are extenders with rubber fittings that will be pressed into the openings on the tank head. Thread the two connectors onto the head and fully tighten them to secure the bypass valve in position.


Install The MNPT Fitting
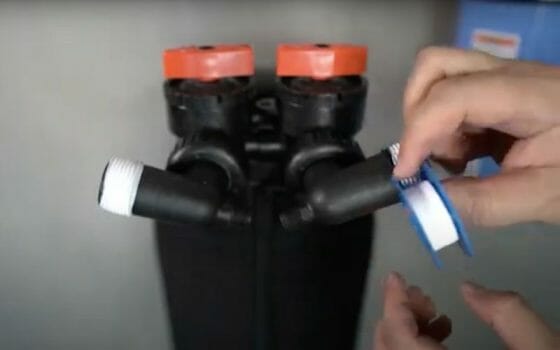
Next, you will install the MNPT fittings (male fittings). Insert the rubberized fitting into the opening on the bypass valve and then tighten it in place. Repeat this on the other side of the bypass for the other fitting.


Activate And Flush The Carbon Media
The hose bib adapter will now be required to soak the media inside the tank. Locate the inlet side on the carbon filter tank and then fully tighten the hose bib adapter to that connection. A garden hose will then be connected to the hose bib adapter. Before turning on the water, ensure that the bypass is not activated. Turn on the water to the hose about half way. Once water begins to exit the tank the water can be turned off. The valves on the tank head will now be set to bypass. The hose can now be disconnected. The tank will now be moved off into a safe location. In order to properly activate the charcoal, it will need to soak for 24 – 48 hours prior to installation.
After the time has elapsed, the media inside the tank will need to be flushed. Begin by connecting your water hose to the inlet side of the tank. Go ahead and turn off the bypass to the tank. You will also notice water escaping from the other valve. Turn on the water to the hose and allow it to run for a few minutes until it begins to run clear. After a few minutes go ahead and shutoff the water. Disconnect the hose and the hose bib adapter. Reconnect the hose bib adapter to the outflow side of the tank and then connect the garden hose. Turn on the water to the hose and allow it to run for a few minutes. The hose and the hose bib adapter can now be removed.


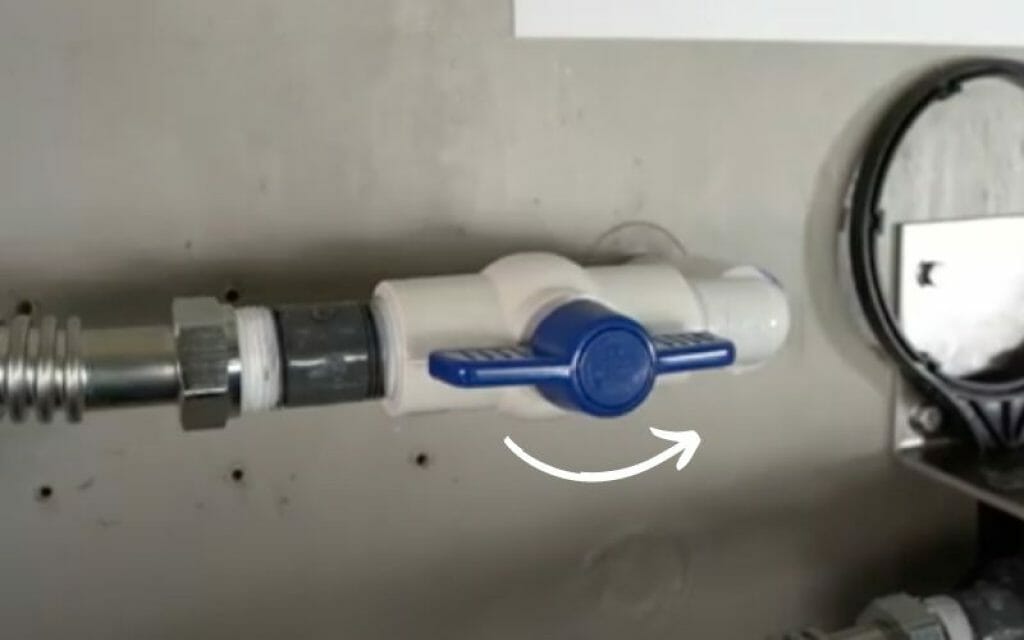
Pre-Plumbing Connection Setup
The next steps of this installation will have you tap into the pre-plumb. Please be sure to shut off the water to the home before performing these steps. Also, note that it’s a recommendation to install the bypass ahead of the system to allow for easy maintenance.
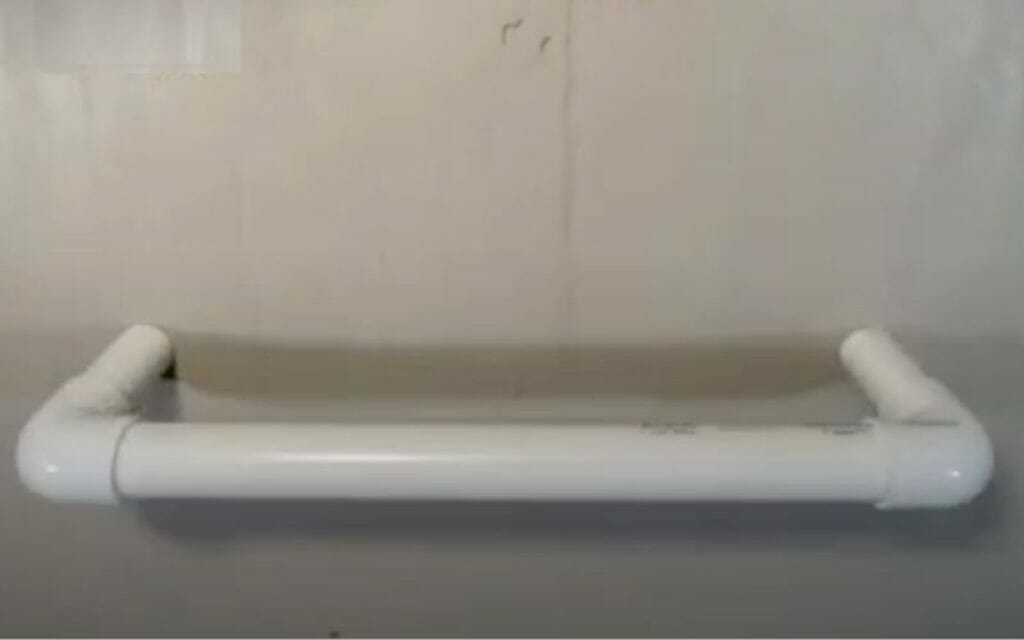
Expose the pre-plumb and then install a connector with a one-inch threaded adapter. You will need a threaded adapter on the other side of the pre-plumb as well. Plumber’s tape will now be applied to the threads of the incoming water supply from the pre-plumbing. A PVC shutoff valve is also installed onto the threaded adapter on the incoming side of the pre-plumb. To avoid any leaks, ensure that the shut-off valve is fully tightened. Prep another PVC nipple with plumber’s tape. It will then be installed onto the other side of the shutoff valve. Please ensure that the PVC nipple is fully tightened.


Connect Tank To Plumbing
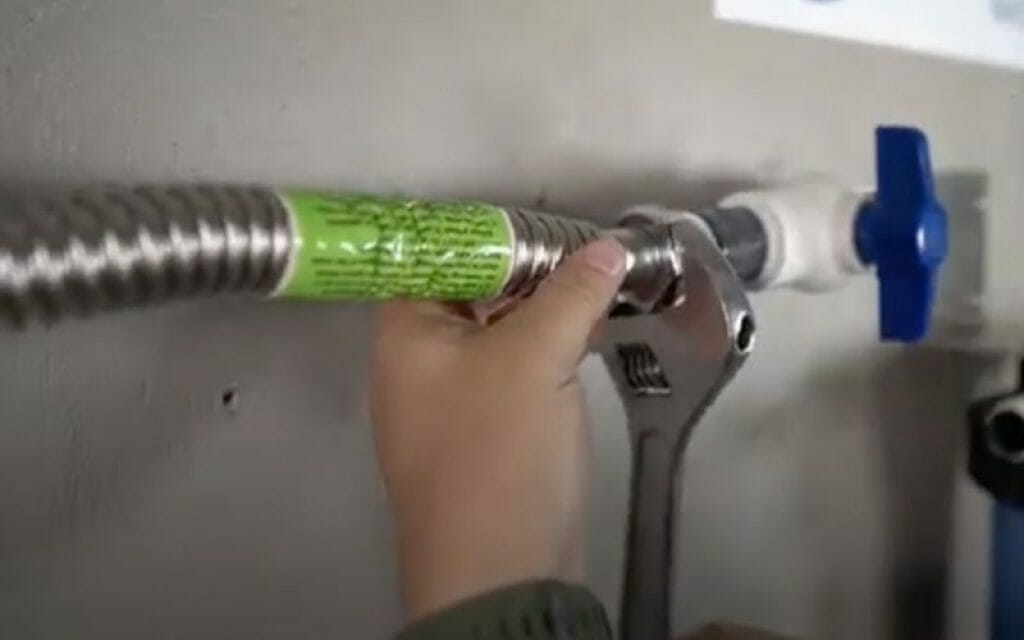
A corrugated water connector will now be connected to the other side of the PVC nipple. Once again, please ensure that it’s fully tightened. The carbon filter tank will now be positioned with the connections facing back. Prep the tank by applying plumber’s tape to both of the connections. The corrugated water connector from the inflowing side from the pre-plumb will now be connected to the incoming side on the carbon filter tank. Tighten the connection by hand and then fully tighten to ensure there are no leaks.
The other corrugated water connector will now be connected to the outflow side of the carbon filter tank. Be sure to fully tighten the connection. That corrugated water connector will now be routed to the outflowing pre-plumb connection. Note that if you have a pre-sediment filter, it will go between the outflowing tank connection and the pre-plump connection.


Test The System
The system is now connected and will need to be tested. Before turning on the water, verify that the shut off valve is in the off position. The bypass valves in the carbon filter tank will also need to be set in the bypass position. One final item before restoring the water is to open the cold water on a bathtub or shower all the way. The water to the home can now be turned back on with water restored. Inspect the shut off valve for any leaks. If none are detected, go ahead and open the shutoff valve allowing water to flow through the system. The water to the tub that you opened will also begin to flow. The flow will be bypassing the carbon filter.
If no leaks are detected you can go ahead and turn off the bypass on the carbon filter tank. Water will now begin flowing through the tank and you should let it run for 10 minutes. During this time inspect the collar for any type of seepage. If any water is detected there could be an issue with the O-ring. If no leaks are detected, the installation is now complete!


Whole House Water Filter Installation Video
How Much Does It Cost For A Professional Install
If you are not a DIY kind of person, getting a professional installation is the best bet. In general, the cost to install a whole house water filter will be between $150 – $650. Prices for installation can vary depending on where your main water line is situated and your location.
FAQs On How To Install A Whole House Water Filter System
How long does it take to install a whole house water filter?
Depending on the system, a whole house filter will take approximately 2 – 3 hours to install. A cartridge-based whole house filtration system may take slightly less time because it is a more simple in-line design. A whole house filter for well water may take longer due to its electronic control head programming and backwash setup. On the other hand, a whole house water filter and softener combo will take the longest since you also need to install a water softener.
Can I install my own whole house water filter?
Yes, you can install your own whole house water filter if you have some light plumbing and mechanical experience. The exception to this is that some manufacturers require professional installation for their warranty coverage.
Where do you install a whole house water filtration system?
Whole house water filtration systems are installed at the main point of entry (POE) for your home’s water supply line. They should be installed ahead of any other appliances like a water heater. Some models are capable of being installed either indoors or outside. This is different from a point-of-use filter system like an under sink filter or reverse osmosis system.